


Looking to boost storage space in your mini PC? Look no further! In this article, we will explore the various ways you can upgrade the storage capacity of your compact computing device. From replacing the existing hard drive to adding an external storage solution, we’ve got you covered. Whether you’re a tech-savvy enthusiast or a casual user, these strategies will help you maximize the potential of your mini PC. So, let’s dive in and discover how you can take your storage game to the next level!
Determining the type of storage
Understanding the existing storage
Before upgrading the storage in your mini PC, it is crucial to understand the existing storage setup. Mini PCs usually come with either a hard disk drive (HDD) or a solid-state drive (SSD) as the primary storage option. Identifying the type of storage you currently have is essential as it will determine the compatibility and options available for the upgrade.

Identifying the compatible storage options
Once you have determined the type of storage in your mini PC, it’s time to explore the compatible storage options for upgrading. If your mini PC currently uses an HDD, you will have the option to either replace it with a larger capacity HDD or upgrade to a faster and more efficient SSD. On the other hand, if your mini PC already has an SSD, you can either replace it with a higher capacity SSD or choose to expand the storage with additional slots or external options, which we will discuss later in this article.
Preparing for the upgrade
Gathering necessary tools
Before diving into the upgrading process, it’s essential to gather the necessary tools. Depending on the type of storage upgrade you are planning to undertake, you may need a screwdriver, SATA cables (for internal storage upgrades), external drives (for data backup and transfers), and any other specific tools mentioned in the mini PC manufacturer’s instructions. Ensuring you have the appropriate tools ready will make the process more efficient and convenient.
Backing up important data
When upgrading the storage in your mini PC, it is crucial to back up all your important data beforehand. This step ensures that no valuable files are lost during the upgrade process. You can choose to transfer your data to an external storage device such as a USB flash drive, external hard drive, or utilize cloud storage services. Make sure to double-check that all your important files, documents, photos, and videos are safely backed up before proceeding with the upgrade.
Understanding warranty and compatibility issues
Before upgrading the storage in your mini PC, it’s important to consider any warranty implications and compatibility issues. In some cases, opening the mini PC case and making modifications to the storage might void the warranty. It is advisable to consult the manufacturer’s documentation or contact their support to understand the warranty terms and how it might be affected by the upgrade. Additionally, compatibility issues can arise when choosing the right storage option for your mini PC. Refer to the manufacturer’s specifications and documentation to ensure the storage upgrade you choose is compatible with your mini PC model.
Replacing or expanding internal storage
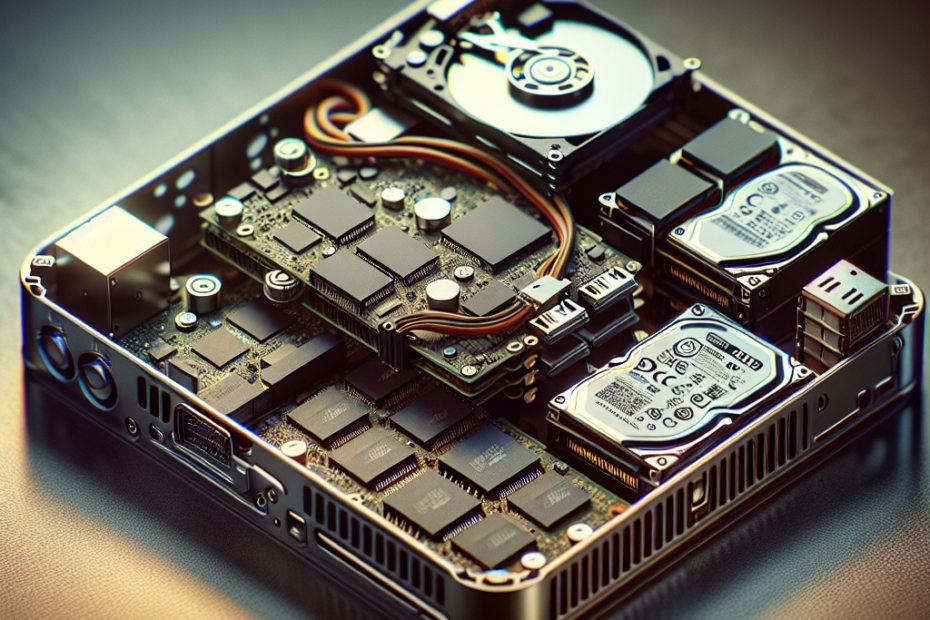
Opening the mini PC case
To replace or expand internal storage in your mini PC, you will need to open the mini PC case. The process may vary depending on the model, so it is crucial to refer to the manufacturer’s instructions or watch tutorials specific to your mini PC model. In general, you will need to remove screws or clips that secure the case and gently separate the top cover to access the internal components.
Removing existing storage
Once you have gained access to the internal components, locate the existing storage device that you wish to replace or remove. Carefully disconnect any cables or connectors that are attached to it, ensuring not to damage any other components in the process. Remove the screws or clips securing the storage device in place and gently take it out from its slot.
Installing new storage
With the existing storage removed, it’s time to install the new storage device. If you are replacing the storage device, align the new device with the slot in the mini PC and secure it with screws or clips. Connect any cables or connectors as necessary, ensuring a secure and proper connection. If you are expanding the storage with an additional slot, follow the manufacturer’s instructions to insert the new storage device correctly.
Expanding storage with additional slots
In some mini PC models, there may be additional slots available for expanding the storage capacity. If you have chosen this option, refer to the manufacturer’s instructions to locate the additional slots within your mini PC. Insert the new storage device into the available slot, securing it with screws or clips if required. Connect any necessary cables or connectors, and ensure proper alignment and connection.
Upgrading storage through external options
Using USB flash drives or external hard drives
If replacing or expanding the internal storage is not a viable option for your mini PC, you can still upgrade the storage using external options. USB flash drives and external hard drives provide a convenient and portable solution for storing your files. Simply connect the USB flash drive or external hard drive to your mini PC’s USB port, and it will be recognized as an additional storage option. You can then transfer files to and from the external storage device as needed.
Opting for network attached storage (NAS)
Another option for upgrading storage in your mini PC is by utilizing network attached storage (NAS). NAS allows you to connect additional storage devices to your home network, providing centralized storage accessible to multiple devices. By setting up a NAS system, you can expand your mini PC’s storage capacity without physically modifying the internal components. This option is particularly suitable for users who require extensive storage space or want to create a network storage solution.
Connecting to cloud storage services
Cloud storage services offer an increasingly popular option for upgrading storage in mini PCs. By subscribing to a cloud storage service such as Google Drive, Dropbox, or Microsoft OneDrive, you can store and access your files remotely. Connecting to cloud storage services requires an internet connection, and files can be easily accessed and transferred using the provided software or web interface. This option provides the advantage of scalability and accessibility, as your files are not limited to physical storage devices.
Migrating data to the new storage
Transferring data using built-in utilities or software
When upgrading the storage in your mini PC, you need to transfer your existing data to the new storage device. Many operating systems offer built-in utilities or software to facilitate the transfer process. For example, in Windows, you can use the “File History” feature or the “Windows Easy Transfer” tool to migrate your data. Mac OS offers the “Migration Assistant” tool for transferring data from one Mac to another. Utilize these tools to simplify the data transfer process and ensure a smooth transition to the new storage device.
Cloning the existing drive
If you want a seamless transition and want your new storage device to mirror the exact content of your existing drive, cloning is an option. Cloning involves creating an exact replica of your existing drive, including the operating system and all files. To clone your drive, you will need specialized cloning software such as Clonezilla or EaseUS Todo Backup. Follow the instructions provided by the software to clone your existing drive to the new storage device, ensuring that all your data and settings are duplicated.

Manually moving files and folders
For users who prefer a manual approach, moving files and folders manually is an option. This method involves selecting and transferring individual files and folders from your existing storage device to the new storage device. Simply open your file explorer or file manager, locate the files and folders you want to move, and copy them to the new storage device. This method gives you complete control over which files to transfer and allows you to organize your data during the process.
Updating drivers and firmware
Checking for driver and firmware updates
After upgrading the storage in your mini PC, it is important to check for driver and firmware updates. Manufacturers often release updates to improve compatibility, performance, and security. Visit the manufacturer’s website and navigate to the support or downloads section to check for the latest driver and firmware updates available for your mini PC model. Download and install the updates as instructed, ensuring that you have the most up-to-date software running on your device.

Downloading and installing the latest versions
When downloading and installing driver and firmware updates, make sure to follow the manufacturer’s instructions carefully. Download the provided files from the official website, and run the installation wizards or tools as instructed. It is crucial to ensure that you are installing the correct and compatible drivers and firmware for your mini PC model to avoid any compatibility or performance issues.
Optimizing the storage performance
Configuring storage settings for maximum performance
To optimize the storage performance in your mini PC, it is worth exploring the storage settings provided by your operating system. In Windows, for example, you can adjust settings related to power management, disk optimization, and indexing options. By configuring these settings, you can prioritize performance over power saving and enhance the overall storage performance of your mini PC. Refer to the operating system documentation or search for specific guides to understand and apply the appropriate settings for your needs.

Enabling storage device optimizations
In addition to operating system settings, you can further optimize the storage performance by enabling specific optimizations provided by the storage devices themselves. Many SSDs, for instance, come with their own software that allows you to enable features like TRIM (which helps maintain SSD performance), over-provisioning (which improves longevity and performance), and firmware updates. Check the manufacturer’s documentation and download the appropriate software to enable these optimizations, maximizing the performance and lifespan of your storage devices.
Managing the storage space
Organizing files and folders
Managing your storage space involves organizing your files and folders efficiently. Keeping your files organized not only helps you find what you need quickly but also improves the overall performance of your mini PC. Create folders and subfolders to categorize your files based on type or topic. Utilize descriptive names for files and folders to enhance searchability. Regularly review and clean up your storage by deleting unwanted files or moving them to external storage devices or cloud storage solutions. A well-organized storage system will make it easier to locate and manage your files effectively.
Removing unnecessary files
Over time, your storage may accumulate unnecessary files that take up valuable space. These could be temporary files, duplicate files, or outdated backups. It is important to periodically review and remove these unnecessary files to free up storage space and maintain optimal performance. Use disk cleanup utilities specific to your operating system or consider utilizing third-party cleanup software to assist in identifying and removing these files safely. Always exercise caution when deleting files and ensure you are not removing anything critical or important.
Utilizing storage management tools
To help manage storage space effectively, consider utilizing storage management tools. Operating systems often provide built-in tools or applications that can assist in monitoring and managing storage. These tools can provide insights into storage usage, identify large files or folders that can be removed or moved to external storage, and help optimize disk space. Additionally, there are several third-party storage management tools available that offer advanced features and customization options to suit your specific needs. Explore these tools to enhance your storage management capabilities.
Troubleshooting common issues
Resolving compatibility issues
After upgrading the storage in your mini PC, it is possible to encounter compatibility issues. These can manifest as error messages, system crashes, or unrecognized storage devices. To resolve compatibility issues, ensure that you have installed the most up-to-date drivers and firmware for your mini PC and that the new storage device is compatible with your system. Check for any reported compatibility issues on the manufacturer’s forums or support pages. If problems persist, contact the manufacturer’s support for further assistance and guidance.
Troubleshooting connection problems
When using external storage options such as USB flash drives, external hard drives, or network attached storage, connection problems may arise. Ensure that the connections are secure and properly inserted. Try using a different USB port or cable, as faulty connections can cause issues. If you are experiencing network-related connection problems with network attached storage, check your network settings, including IP addresses and network protocols. Restarting your mini PC and the storage device can also help resolve connection issues. If the problem persists, consult the manufacturer’s documentation or contact their support for assistance.
Dealing with slow data transfer speeds
Slow data transfer speeds can be frustrating when upgrading storage in your mini PC. There are several factors that can contribute to slow transfer speeds, including older USB ports, outdated drivers, or limitations in the storage devices themselves. To address slow data transfer speeds, ensure that you are using USB ports that support higher data transfer rates. Check for driver updates and install the latest versions to optimize performance. In some cases, using different USB cables or trying different storage devices might improve transfer speeds. If the issue persists, it may be beneficial to consult with technical support or seek professional assistance.
Considerations for future upgrades
Choosing storage options with future expansion in mind
When upgrading the storage in your mini PC, consider options that provide room for future expansion. Opting for a higher capacity storage device than your current needs ensure that you have adequate space for future file growth. Additionally, if your mini PC supports expandable storage options such as additional slots, choosing a model with available expansion options can save you from the need to replace the whole storage system in the future. Assess your storage needs and consider the scalability of your chosen storage options to accommodate future upgrades.
Planning for regular maintenance and upgrades
Regular maintenance and upgrades are essential for maintaining the longevity and optimal performance of your mini PC’s storage. Plan for routine checks, such as cleaning out unnecessary files, updating drivers and firmware, and organizing your storage. Set reminders or create a maintenance schedule to ensure that these tasks are performed regularly. Additionally, stay informed about the latest storage technologies and advancements. Being proactive and planning for regular maintenance and upgrades will help you keep your mini PC’s storage system in top shape and maximize its lifespan.
Upgrading the storage in a mini PC can greatly enhance its performance and provide you with ample space to store your files and data. By following the steps outlined in this comprehensive article, you will be well-equipped to determine the type of storage, prepare for the upgrade, replace or expand internal storage, explore external options, migrate data, update drivers and firmware, optimize storage performance, manage storage space, troubleshoot common issues, and plan for future upgrades. With a well-planned and executed upgrade, you can enjoy an improved storage experience on your mini PC for years to come.
Disclosure: As an Amazon Associate, I earn from qualifying purchases.