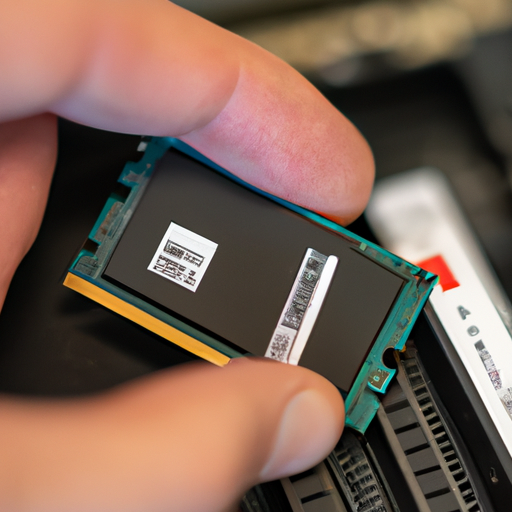


Have you ever wondered how to upgrade the RAM or storage in a mini PC? It may seem like a daunting task, but fear not! In this article, we will walk you through the step-by-step process of upgrading these essential components, ensuring that your mini PC runs faster and can store all your important files and programs. So, whether you’re a tech enthusiast or just someone looking to give their mini PC a boost, read on to discover the secrets of upgrading RAM and storage in a mini PC.
RAM upgrade process
When it comes to upgrading the RAM in your mini PC, there are a few important steps to follow. The first step is to check the compatibility of the RAM. Not all RAM modules are compatible with every mini PC, so it’s essential to make sure that the RAM you’re considering is compatible with your specific model.
Once you have determined the type and capacity of RAM needed, it’s time to start the actual upgrade process. Begin by turning off and unplugging your mini PC. This is a crucial safety measure to prevent any electrical damage during the upgrade.
Next, open the mini PC case. The process for opening the case can vary depending on the model of your mini PC, so make sure to consult the user manual for specific instructions. Once you have opened the case, you will need to locate the RAM slots. These slots are where the RAM modules will be inserted.
If your mini PC already has existing RAM modules, you will need to remove them before inserting the new modules. To remove the existing RAM, gently press the clips on either side of the module to release it from the slot. Carefully pull the module out and set it aside.
With the existing RAM removed (if applicable), it’s time to insert the new RAM modules. Make sure to align the notch on the module with the key in the slot, and then firmly press the module down until it clicks into place. Repeat this process for each module you are installing.
Once all of the new RAM modules are inserted, it’s time to close the mini PC case. Ensure that all cables and connections are properly arranged before closing the case. Once the case is closed, it’s time to turn on the mini PC and check if the new RAM is recognized.
To check if the new RAM is recognized, you can go into the mini PC’s BIOS settings. The BIOS settings can usually be accessed by pressing a specific key (commonly Del or F2) during the startup process. Once in the BIOS, navigate to the system information section and check if the new RAM capacity is displayed correctly.
Finally, it’s important to test the new RAM for stability. Run some resource-intensive tasks or run a memory test program to ensure that the new RAM is functioning properly. If any stability issues are encountered, it may be necessary to troubleshoot the installation or consider replacing the RAM modules.
Storage upgrade process
In addition to upgrading the RAM in your mini PC, you may also want to upgrade the storage capacity. This can be especially useful if you are running out of space for your files, or if you want to increase the speed of your storage with a solid-state drive (SSD).
The process for upgrading the storage in a mini PC is similar to the RAM upgrade process. To begin, you will need to determine the type and capacity of storage needed. Consider the type of storage you want to upgrade to, such as a traditional hard disk drive (HDD), a solid-state drive (SSD), or the more compact M.2 form factor.
Once you have determined the type and capacity of storage needed, follow the same safety precautions as the RAM upgrade process. Turn off and unplug the mini PC, and then open the case according to the instructions in the user manual.
Locate the storage drive(s) within the mini PC. Depending on the model, you may have multiple storage slots available. If there are existing storage drives, you will need to remove them before inserting the new drives. Just like with the RAM modules, gently disconnect any cables and remove the existing drives from their respective slots.
Now it’s time to insert the new storage drive(s). Carefully align the drive with the slot, ensuring that the connectors match up correctly. Once aligned, gently push the drive into the slot until it is seated properly. If necessary, connect the necessary cables for data and power, making sure they are securely attached.
With the new storage drive(s) installed, close the mini PC case, ensuring that all cables are properly arranged. Turn on the mini PC and check if the storage is recognized. You can do this by going into the BIOS settings and checking the storage capacity.
Determining RAM or storage compatibility
Before upgrading the RAM or storage in your mini PC, it is essential to ensure compatibility with your specific model. Each mini PC has its own specifications and limitations when it comes to RAM and storage upgrades. Here are some steps to help determine compatibility:
Start by checking the mini PC’s specifications. You can usually find this information in the user manual or by visiting the manufacturer’s website. Look for information about supported RAM and storage types.
Identify the RAM or storage type supported by your mini PC. This could be DDR2, DDR3, DDR4 for RAM, or HDD, SSD, M.2 for storage. Knowing the supported types will help you find the appropriate upgrade options.
Take note of the maximum capacity supported by your mini PC. This is the maximum amount of RAM or storage that your mini PC can handle. Exceeding this capacity may result in compatibility issues.
Ensure that the form factor of the RAM or storage is compatible with your mini PC. Mini PCs typically have limited space, so it’s crucial to choose RAM or storage with a form factor that fits within the available space.
Consider the requirements of your operating system. Some operating systems may have specific RAM or storage requirements. Make sure the upgrades you choose meet these requirements for optimal performance.
By following these steps, you can ensure that the RAM or storage you choose is compatible with your mini PC, preventing any compatibility issues during the upgrade process.
Choosing the right RAM
Choosing the right RAM for your mini PC upgrade is crucial to ensure optimal performance. Here are some factors to consider when selecting the appropriate RAM:
Determine the required RAM type for your mini PC. This can be DDR2, DDR3, DDR4, or any other specific type. Your mini PC’s specifications or user manual should provide information on the supported RAM types.
Identify the maximum capacity of RAM supported by your mini PC. This information will help you determine the amount of RAM you can install for optimal performance. Upgrading to the maximum supported capacity can greatly improve your mini PC’s multitasking capabilities.
Consider the clock speed and latency of the RAM modules. Higher clock speeds and lower latencies generally result in better performance. However, it’s important to ensure that the RAM you choose is supported by your mini PC.
Check if your mini PC requires ECC (Error Correction Code) RAM. ECC RAM is designed to detect and correct common data errors, making it beneficial for critical applications that require high reliability and stability. Not all mini PCs support ECC RAM, so make sure to check the specifications before purchasing.
By considering these factors, you can choose the right RAM for your mini PC that meets the requirements of your applications and enhances overall performance.
Choosing the right storage
Upgrading the storage in your mini PC can significantly improve its speed and overall performance. Here are some factors to consider when choosing the right storage for your mini PC upgrade:
Determine the required storage type for your mini PC. This can be a traditional hard disk drive (HDD), a solid-state drive (SSD), or the more compact M.2 form factor. Each type has its own advantages and limitations, so choose based on your specific needs.
Identify the maximum storage capacity supported by your mini PC. This information will help you determine the size of the storage drive you can install. Higher capacity drives allow you to store more data, but they may also come at a higher cost.
Consider the form factor of the storage drive. Mini PCs typically have limited space, so it’s important to choose a storage drive with a form factor that fits within the available space. Common form factors include 2.5-inch, 3.5-inch, and M.2.
Evaluate the read and write speeds of the storage drive. Solid-state drives generally offer faster read and write speeds compared to traditional hard disk drives. If speed is a priority for your applications, consider opting for an SSD.
Decide between a traditional HDD or a faster SSD based on your needs. HDDs generally offer higher storage capacities at a lower cost, while SSDs provide faster data access speeds. Consider your storage needs and budget when making this decision.
By considering these factors, you can choose the right storage for your mini PC upgrade, maximizing its performance and storage capabilities to suit your specific requirements.
Disclosure: As an Amazon Associate, I earn from qualifying purchases.


