


Have you ever wondered how to effectively clean the dust out of a mini PC? With their compact design and limited space, it can be challenging to tackle the buildup of dust and debris. In this article, we will explore some simple yet effective tips on how to keep your mini PC clean and running smoothly. Say goodbye to overheating and sluggish performance as we guide you through the process of dusting off your beloved mini PC.
Understanding the Importance of Regular Cleaning
Impacts of dust on mini PC performance
Regular cleaning plays a crucial role in maintaining the optimal performance of your mini PC. Dust accumulation inside the components can lead to various issues like overheating, reduced airflow, and increased noise levels. When dust settles on the heat sinks and fans, it hinders their ability to dissipate heat efficiently, causing the temperature inside the mini PC to rise. This can result in thermal throttling, where the performance of the PC is automatically reduced to prevent damage. Moreover, the accumulation of dust on the internal hardware may also lead to component failure over time.

The role of regular cleaning in the longevity of your mini PC
By regularly cleaning your mini PC, you can extend its lifespan and ensure its optimal functionality. When dust and debris accumulate on the internal components, they act as insulators, trapping heat and causing the hardware to work harder to maintain suitable temperatures. This increased workload can stress the components and potentially shorten their lifespan. Regular cleaning not only keeps the system running smoothly but also helps to mitigate the risk of hardware failure.
Identifying the Right Cleaning Tools
Choosing antistatic cleaning tools
When it comes to cleaning a mini PC, it’s essential to use antistatic cleaning tools. Static electricity can cause damage to the sensitive electronic components inside the PC. Antistatic brushes, cloths, and compressed air cans are specifically designed to discharge static electricity, ensuring the safety of your mini PC.
The role of compressed air in dusting
Compressed air is an excellent tool for removing dust from the nooks and crannies of your mini PC. With the help of a canister or an air compressor, you can blow away dust particles from the tight spaces that are hard to reach with other cleaning tools. However, it’s important to use compressed air in short bursts and at a safe distance to avoid damaging any delicate components or disturbing the internal connections.
The importance of microfiber cloths
Microfiber cloths are ideal for wiping down surfaces and removing fingerprints and smudges from the exterior of your mini PC. These soft, lint-free cloths are gentle on the delicate finishes and prevent scratching or leaving behind lint fibers that could potentially clog the internal components.
Using brush sets for computers
Brush sets with different bristle sizes are incredibly useful for cleaning the mini PC’s internal components. The bristles can help dislodge dust from fans, heat sinks, and other intricate areas where compressed air may not be enough. Make sure to choose brushes specifically designed for electronics, as they are typically antistatic and won’t cause any damage to the delicate hardware.
Pre-Cleaning Steps
Depowering the mini PC
Before you begin the cleaning process, it is essential to turn off your mini PC and unplug it from the power source. This ensures the safety of both the components and yourself while cleaning. It’s also a good idea to discharge any static electricity by touching a metal surface to prevent any potential damage caused by electrostatic discharge.
Unplugging peripherals and cords
To have easy access to the internal components, it’s important to disconnect all external peripherals and cords connected to your mini PC. This includes unplugging the monitor, keyboard, mouse, speakers, and any other devices. This will make the cleaning process more efficient and prevent any accidental damage to peripherals.
Establishing a clean and well-lit workstation
Creating a clean and well-lit workstation prior to cleaning your mini PC is crucial for ensuring a successful cleaning process. Choose an area with ample space, free from dust and debris. Make sure to have good lighting to provide clear visibility of the components and prevent any accidental damage during the cleaning process.
Removing the Outer Case
Consulting your mini PC manual
Every mini PC model may have a slightly different method for removing the outer case. Consult the user manual or manufacturer’s guide specific to your mini PC model to understand the correct procedure. The manual will provide detailed instructions and illustrations that will guide you through the process safely.
Carefully detaching the outer cover
Once you have familiarized yourself with the appropriate method, you can carefully detach the outer cover of your mini PC. Follow the instructions provided in the manual, ensuring that you handle the cover with care to avoid causing any damage to the internal components or the cover itself.
Making note of screw placements
As you remove the outer case, it’s helpful to make note of the screw placements. This will ensure that you can easily reassemble the mini PC without any confusion or misplaced screws later on. Keeping the screws organized and labeled will save time and prevent potential damage during reassembly.
Inspecting the Internal Components
Identifying parts at risk from dust accumulation
Once you have removed the outer case, take a moment to inspect the internal components. Identify areas prone to dust accumulation, such as the heat sinks, fans, and filters. These are the areas that require extra attention during the cleaning process to maintain optimal airflow and cooling.
Checking the heat sinks and fans
The heat sinks and fans play a vital role in keeping the mini PC cool. Inspect these components closely for any visible dust build-up. Dust can accumulate on the fan blades, blocking airflow and reducing cooling efficiency. Similarly, the heat sinks can become clogged with dust, impacting their ability to dissipate heat effectively. Cleaning these components is crucial for maintaining efficient cooling and preventing overheating.

Detecting hardware that might need replacing
While inspecting the internal components, keep an eye out for any hardware that may need replacing. Look for damaged fans, loose connections, or signs of wear and tear on any parts. If you notice anything concerning, it may be necessary to replace the component before reassembling the mini PC.
Initial Dust Removal
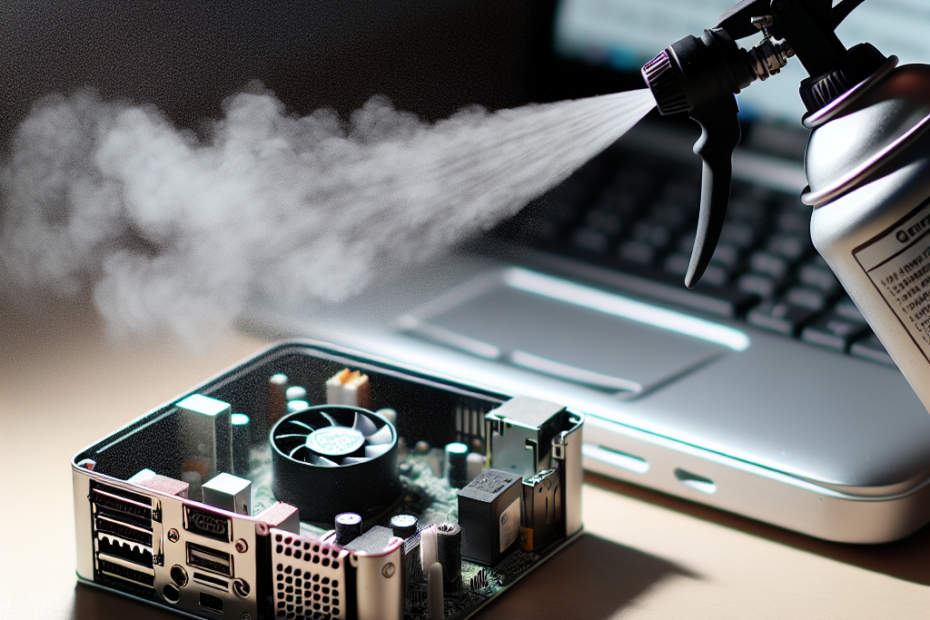
Using compressed air for initial dusting
Start by using compressed air to remove loose dust from the internal components. Hold the canister or air compressor at a safe distance to avoid directing the airflow with excessive pressure. Use short bursts of air to blow away the dust, focusing on the areas prone to accumulation, such as the fans and heat sinks. This initial dusting will help dislodge and remove the loose debris before moving on to more detailed cleaning.
Direction of spraying to avoid further dust settlement
When using compressed air, it’s crucial to direct the airflow in a way that avoids further dust settlement. Blow the compressed air in a direction that pushes the dust away from the internal components and towards the open side of the mini PC. This will prevent dust from being pushed into other areas of the system and minimize the chances of it settling back onto the cleaned components.
Focusing on heat sinks and fans
During the initial dust removal, pay special attention to the heat sinks and fans. These areas tend to accumulate the most dust and are critical for efficient cooling. Use short bursts of compressed air to dislodge the dust from the fan blades, ensuring proper airflow. For the heat sinks, blow the compressed air to clear any trapped dust and ensure optimal heat dissipation.

Detailed Cleaning of Components
Cleaning hard-to-reach areas using brushes
After the initial dust removal, it’s time to tackle the hard-to-reach areas using brushes. Choose brushes with soft bristles and different sizes to effectively clean intricate spaces. Gently brush away the dust from the fans, heat sinks, and other components. Be careful not to apply excessive force, as it could damage the delicate hardware. The brushes will help remove stubborn dust particles that were not dislodged by compressed air.
Wiping surfaces with microfiber cloths
Microfiber cloths are excellent for wiping down surfaces and removing any remaining dust or fingerprints. Using a clean microfiber cloth, gently wipe the exterior and interior surfaces of the mini PC. Pay close attention to fan grilles, vents, and any other areas where dust tends to accumulate. The soft microfiber material will prevent scratches and leave the surfaces clean and dust-free.

Cleaning the Outer Case
Using a damp cloth for stubborn dirt
If the outer case has stubborn dirt or stains, you can use a damp cloth for removal. Dampen a microfiber cloth with water or a mild cleaning solution specifically formulated for electronics. Wring out any excess moisture, ensuring the cloth is only slightly damp. Gently wipe the surface of the outer case, applying minimal pressure. Avoid excessive moisture, as it could seep into the mini PC and damage the internal components.
Ensuring the case is dry before reassembly
After cleaning with a damp cloth, it is crucial to ensure that the outer case is completely dry before reassembly. Leave the case in a dry and well-ventilated area, allowing any moisture to evaporate naturally. Do not use any external heat sources or blow dryers, as the heat may damage the case or the internal components.
Reassembling the Mini PC
Reinstalling the parts in the correct order
Once the cleaning process is complete and all components are dry, reassembling the mini PC is the next step. Refer to the user manual or manufacturer’s guide to reinstall the parts in the correct order. Start by carefully aligning and reconnecting any disconnected cables or peripherals. Follow the instructions provided to ensure a proper fit and avoid any potential damage during reassembly.
Attaching the outer cover securely
After reinstalling all the components, it’s time to attach the outer cover securely. Align the cover with the appropriate screw placements noted earlier and gently fasten the screws. Make sure not to overtighten, as it could damage the case or strip the screw threads. Verify that the cover is snugly attached, ensuring the safety and aesthetic integrity of your mini PC.
Post-Cleaning Checks
Performing a test run
After reassembling the mini PC, it’s crucial to perform a test run to ensure everything is functioning correctly. Power on the system and verify that all the components are operational. Check if the fans are spinning, listen for unusual noises, and observe the computer’s response during regular tasks. If any issues arise, it may be necessary to reassess the cleaning process or consult a professional for further assistance.
Observing temperature and noise levels
During the test run, pay attention to the temperature and noise levels of your mini PC. Monitor the CPU and GPU temperatures using software tools or BIOS settings. If the temperatures remain within acceptable ranges and the noise levels are normal, it indicates that the cleaning process was successful in maintaining proper airflow and cooling.
Setting a regular cleaning schedule
To ensure the longevity and optimal performance of your mini PC, it’s essential to set a regular cleaning schedule. Dust accumulation can happen relatively quickly, depending on the environment, so regular maintenance is key. Consider cleaning your mini PC every 3-6 months, or more frequently if you live in a particularly dusty or pet-filled environment. Setting a regular cleaning schedule will help prevent dust buildup and maintain the efficiency of your mini PC in the long run.
By understanding the importance of regular cleaning and following the proper procedures outlined in this article, you can ensure that your mini PC remains in top-notch condition, delivering reliable performance and a prolonged lifespan. With the right cleaning tools, pre-cleaning steps, and a systematic approach to removing dust from both the external and internal components, you can maintain optimal airflow, prevent overheating, and enjoy a clean and well-functioning mini PC experience.
Disclosure: As an Amazon Associate, I earn from qualifying purchases.