


Are you looking for a home-lab setup on a single CPU? Well, Hardware Haven has got you covered with their informative video. In the video, they discuss the hardware and software used, the assembly and configuration process, as well as the issues encountered during the setup. They also perform testing on various applications and discuss power consumption. Ultimately, the video raises the question of whether this setup is a good idea, examining the potential drawbacks and specific use cases. So, if you’re curious about running multiple servers and network appliances on a single server, this video is definitely worth checking out.
In the video, the author introduces the AMD Ryzen 9 3950x CPU and the Gigabyte B550 Vision DASH P motherboard as the main components of the server. They discuss their intention to use the server for video editing and virtualization, and the chosen hypervisor, Proxmox. The author sets up various virtual machines and containers on the server, encountering difficulties with GPU pass-through and resorting to software transcoding for video editing. They also discuss the power consumption of the server and conclude that while it may not be the most efficient setup, it has its uses for specific purposes like hosting Minecraft servers.

Overview of Home-Lab Setup on a Single CPU
Description of the lab setup
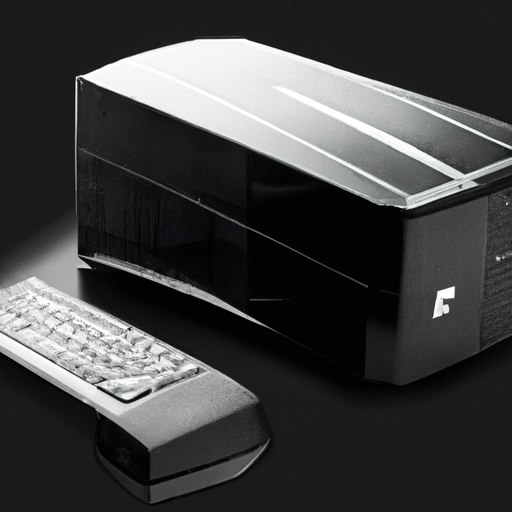
Setting up a home-lab on a single CPU involves utilizing a powerful AMD Ryzen 9 3950x CPU and a Gigabyte B550 Vision DASH P motherboard. The goal of this setup is to virtualize multiple servers and network appliances, consolidating them into one server for efficient management and reduced power consumption. Additional hardware components, such as memory and storage devices, are also included to ensure optimal performance.
Main purpose of the setup
The main purpose of this home-lab setup is to achieve flexibility, efficiency, and cost-effectiveness in managing various servers and network appliances. By virtualizing these systems, you can consolidate them into a single server, saving physical space and reducing power consumption. This setup allows you to perform tasks such as video editing and virtualization more efficiently while also enabling easy scalability and resource allocation.
Addressing potential drawbacks
While a home-lab setup on a single CPU offers numerous benefits, there are potential drawbacks to consider. One potential drawback is the limited expansion capability of a single server, which may not accommodate future growth or the need for additional hardware. Additionally, there may be limitations in terms of hardware compatibility and resource allocation. However, these drawbacks can be mitigated by careful planning and considering alternative setups for specific use cases.
Breakdown of Hardware Components
Explanation of the AMD Ryzen 9 3950x CPU
The AMD Ryzen 9 3950x CPU is a powerful 16-core, 32-thread processor based on the 7 nanometer Zen 2 architecture. With a base clock of 3.5 GHz and a boost frequency of 4.7 GHz, it offers exceptional performance for demanding tasks such as video editing and virtualization. Despite being over three years old, this CPU can still be found at an affordable price on the used market, making it a great choice for a home-lab setup.
Review of the Gigabyte B550 Vision DASH P motherboard
The Gigabyte B550 Vision DASH P motherboard is specifically chosen for its compatibility with the AMD Ryzen 9 3950x CPU. It features integrated Thunderbolt 3 ports, dual 2.5-gigabit NICs, and support for PCIe 4.0. While it may not be the best choice for server workloads, it offers sufficient features for the intended video editing and virtualization purposes of this home-lab setup. The inclusion of ECC memory support further enhances its flexibility.
Detailing of additional hardware utilized
In addition to the CPU and motherboard, other hardware components are utilized in this home-lab setup. Crucial DDR4 2400 memory sticks are used to ensure sufficient RAM for virtual machines and containers. The Deepcool AK620 serves as the CPU cooler, keeping the Ryzen 9 3950x cool during demanding tasks. An EVGA 650W power supply is utilized to provide sufficient power for the entire system. Lastly, storage devices, such as a SATA PCIe card and two 10TB drives, are incorporated for storing virtual machine images and data.
Choosing the Appropriate Software
Introduction to the use of Proxmox
Proxmox is chosen as the hypervisor software to virtualize servers and appliances in this home-lab setup. Proxmox is an open-source platform that combines virtualization, containerization, and software-defined storage in a single powerful solution. It offers a web-based interface for managing virtual machines and containers, making it user-friendly and accessible.
Understanding how Proxmox aids in virtualizing servers and appliances
Proxmox allows for the creation and management of virtual machines (VMs) and containers. VMs enable the virtualization of entire servers, replicating their hardware and operating systems. Containers, on the other hand, provide lightweight virtualization, utilizing the same kernel as the host system. By utilizing Proxmox, administrators can easily create, clone, and manage multiple VMs and containers, providing flexibility and ease of use.
Discussion on software considerations for a single CPU setup
When setting up a home-lab on a single CPU, it is essential to consider the software requirements and compatibility. Choosing operating systems and software applications that are resource-efficient and compatible with the chosen hypervisor is crucial. Additionally, configuring network settings, security measures, and backup strategies should be carefully considered to ensure the smooth operation of the home-lab setup.
Setting up the Home-Lab
Detailing the ideal place and method for setting up the lab
When setting up a home-lab, it is important to find an ideal location, preferably one with good ventilation and easy access to power and network connections. Choosing a dedicated space, such as a spare room or basement, can help minimize noise and ensure proper organization of the equipment. Additionally, using server racks or mounting solutions can provide a neat and organized setup, making it easier to manage and maintain.
Discussion on best practices and safety precautions
When setting up a home-lab, it is important to follow best practices and safety precautions to ensure the longevity and stability of the hardware. This includes grounding the equipment, properly managing cables, and ensuring proper cooling. Regular maintenance, such as cleaning dust filters and monitoring temperatures, should also be performed to prevent hardware issues.
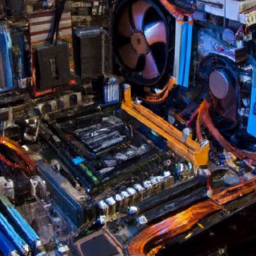
Visual breakdown of the assembly process
Setting up a home-lab on a single CPU involves an assembly process that includes mounting the CPU, installing memory modules, connecting storage devices, and ensuring proper power connections. This process should be performed carefully, following manufacturer guidelines and documentation. A visual breakdown of the assembly process can further assist in understanding the steps involved.
Software Installation and Configuration
Step-by-step walkthrough of Proxmox installation
The installation of Proxmox involves downloading the ISO file and creating a bootable USB drive. With the USB drive prepared, the installation process can be initiated, guiding users through the installation steps, including disk partitioning and network configuration. Following the installation, the Proxmox web interface can be accessed to configure settings and manage VMs and containers.
Configuration of various virtual machines and containers
Once Proxmox is installed, virtual machines and containers can be created and configured to replace various servers and appliances. This process involves selecting the appropriate operating systems, allocating resources, configuring network settings, and installing necessary software. By following proper configuration practices, administrators can effectively replicate and replace their existing servers and appliances.
Addressing potential software conflicts and solutions
During the installation and configuration process, it is possible to encounter software conflicts or compatibility issues. These can be addressed by consulting documentation, online forums, or official support channels. By identifying the root cause of the conflicts and understanding the solutions provided, administrators can overcome these obstacles and achieve a stable and functional home-lab setup.
Encountered Issues during the setup
Discussion on the difficulties with GPU pass-through
One of the issues encountered during the home-lab setup was related to GPU pass-through for video editing purposes. GPU pass-through allows virtual machines to directly utilize the power of a dedicated GPU. However, due to limitations in hardware compatibility and driver support, the author had difficulties implementing GPU pass-through. This required resorting to software transcoding for video editing tasks.
Overview of resorting to software transcoding
Software transcoding involves utilizing the CPU’s processing power to perform video transcoding tasks instead of relying on a dedicated GPU. While this may not deliver the same level of performance as GPU transcoding, it can still be a viable solution for video editing purposes. By configuring software transcoding settings and utilizing appropriate software applications, the author successfully transcoded videos on the home-lab setup.
Considerations for troubleshooting and issue resolution
When encountering issues during the home-lab setup, troubleshooting and issue resolution become important steps. This involves identifying the root cause of the problem, researching potential solutions, and implementing them effectively. These considerations may involve checking hardware compatibility, updating software drivers, or adjusting configuration settings. By following a systematic troubleshooting process, administrators can resolve issues and improve the functionality of their home-lab setup.

Experimental Testing
Setup and testing parameters
Experimentation and testing were conducted on the home-lab setup to evaluate its performance and functionality. The setup parameters included running applications such as Jellyfin, Cinebench, and a Minecraft server on the virtual machines and containers. These applications were chosen to reflect various scenarios and usage patterns, enabling a comprehensive analysis of the home-lab setup’s capabilities.
Testing of applications like Jellyfin, Cinebench, and a Minecraft server
The testing process involved running applications like Jellyfin, an open-source media server, Cinebench, a benchmarking software for CPU performance, and a Minecraft server. These applications were selected to evaluate the performance of the home-lab setup in scenarios such as media streaming, CPU-intensive tasks, and multiplayer gaming. By testing these applications, the author gained insights into the capabilities and limitations of the setup.
Analyzing and discussing the test results
After conducting the experimental testing, the author analyzed and discussed the test results to evaluate the performance and efficiency of the home-lab setup. The test results provided valuable insights into factors such as resource utilization, power consumption, and overall system performance. By analyzing the results, the author was able to draw conclusions and make informed recommendations regarding the setup’s suitability for different use cases.
Understanding Power Consumption
Overview of energy needs for the home-lab setup
Power consumption is an important consideration when running a home-lab setup. The author provides an overview of the estimated energy needs for the setup, considering the power requirements of the CPU, motherboard, memory modules, storage devices, and other components. Understanding the energy needs helps in assessing the overall cost and sustainability of running the home-lab setup.
Specific feedback on the server’s power consumption
The author discusses the specific power consumption of the server during different operations and workloads. By using power monitoring tools and measuring power draw, the author provides insights into the power consumption patterns of the home-lab setup. This information is valuable for evaluating the efficiency and cost-effectiveness of running the setup and helps in making informed decisions regarding power management.
Cost implications and energy efficiency considerations
Considering the cost implications and energy efficiency of running a home-lab setup is crucial. The author discusses the potential financial impact of increased energy consumption and how it relates to the overall cost-effectiveness of the setup. Additionally, energy efficiency considerations are highlighted, emphasizing the importance of optimizing power usage and exploring ways to reduce energy consumption without sacrificing performance.
Testing Efficiency on Video Editing and Virtualization
Purpose of utilization for video editing and virtualization
The author clarifies the main purpose of utilizing the home-lab setup for video editing and virtualization. Video editing requires substantial processing power and storage capabilities, making a powerful CPU and sufficient memory crucial. Virtualization allows for the creation of multiple virtual machines, enabling efficient resource allocation and flexibility in managing servers and appliances. By combining video editing and virtualization, the author aims to achieve seamless workflow management and improved efficiency.
Testing process and how efficiency was measured
To measure the efficiency of the home-lab setup in video editing and virtualization, the author conducted tests using video editing software and different virtualization workloads. The testing process involved evaluating factors such as rendering times, responsiveness, and overall system performance. By comparing the results with a baseline and industry standards, the author assessed the efficiency of the setup.
Discussion of test findings and interpretations
Based on the test findings, the author discusses and interprets the efficiency of the home-lab setup for video editing and virtualization. The findings highlight the strengths and weaknesses of the setup in terms of processing power, storage capacity, and workload management. The discussion provides insights into the performance and limitations of the setup, helping readers understand its suitability for similar use cases.
Conclusion
Summarizing setup pros and cons
In conclusion, setting up a home-lab on a single CPU offers numerous benefits, such as flexibility, efficient resource allocation, and reduced power consumption. The use of an AMD Ryzen 9 3950x CPU and a Gigabyte B550 Vision DASH P motherboard provides the necessary processing power and compatibility for the setup. However, there are potential drawbacks, including limited expansion capability and software compatibility issues.
Analysis of whether this setup was a good idea
The author reflects on whether the setup was a good idea based on the goals, performance, and limitations of the home-lab setup. While the setup may not be the most efficient or scalable option, it serves specific purposes, such as hosting Minecraft servers and managing video editing workloads. The analysis takes into account the trade-offs and the alignment of the setup with the author’s needs and intentions.
Recommendations for different setups and alternatives
Based on the insights gained from the home-lab setup, the author provides recommendations for different setups and alternatives. These recommendations take into consideration factors such as scalability, budget constraints, and specific use cases. The author encourages readers to assess their own requirements and explore alternative solutions that may better suit their needs.
Disclosure: As an Amazon Associate, I earn from qualifying purchases.